
Photography for Beginners: A Complete Guide to Getting Started
Have you ever looked at a breathtaking photograph and wondered how the photographer managed to capture such a perfect slice of time? Walking into the world of photography can feel like stepping into a foreign country. You are suddenly surrounded by complex jargon, expensive gear, and an overwhelming array of buttons, dials, and menus. It is easy to feel discouraged and retreat to the safety of your smartphone’s automatic mode.
However, great photography is not about owning the most expensive camera or memorizing a technical manual. At its core, photography is the art of capturing light and telling a story. Whether you are using a high-end digital single-lens reflex (DSLR) camera, a sleek mirrorless body, or the phone in your pocket, the fundamental principles remains exactly the same. This comprehensive guide is designed to break down those barriers, demystify the technical aspects, and give you the confidence to start creating stunning visual stories today.
1. Understanding Your Gear: It Is Not About the Price Tag
One of the biggest myths in modern photography is that you need a multi-thousand-dollar setup to take incredible photos. The truth is much simpler: the best camera is the one you have with you. Modern smartphones are equipped with sensors and software that rival entry-level cameras from a decade ago.
When you are starting out, your primary focus should be understanding how your device handles light. If you do own a DSLR or a mirrorless camera, do not be intimidated by its detachable lenses and endless settings. These entry-level interchangeable lens cameras generally come with a “kit lens” (usually an 18-55mm lens). This lens is incredibly versatile and perfect for learning the ropes, covering everything from wide-angle landscapes to tighter portraits. Focus on mastering the tool you currently own before investing your hard-earned money into upgrades.
2. Demystifying the Exposure Triangle
To transition from taking casual snapshots to intentionally creating photographs, you must understand exposure. Exposure is simply the amount of light that reaches your camera’s digital sensor. If too much light hits the sensor, your image will be overexposed (too bright, with washed-out details). If too little light hits it, your image will be underexposed (too dark, with details lost in the shadows).
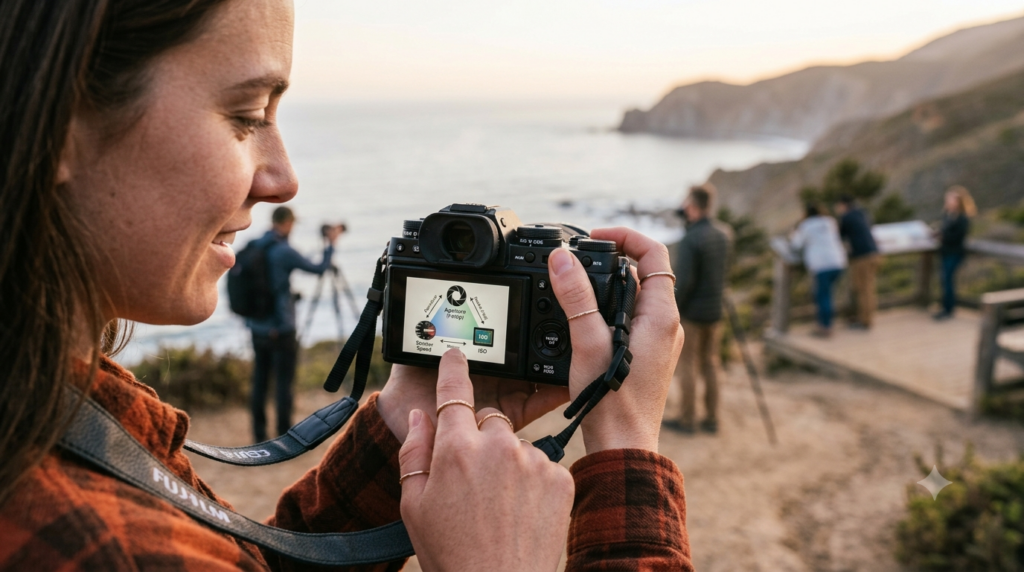
Achieving the perfect exposure relies on balancing three distinct pillars known as the Exposure Triangle: Aberture, Shutter Speed, and ISO.
       [ Aperture (f-stop) ]
          /             \
         /               \
        /                 \
[ Shutter Speed ] ------- [ ISO ]
Aperture: Controlling Light and Focus
Aperture refers to the physical opening inside your camera lens that dictates how much light enters the camera body. It is measured in “f-stops” (such as f/1.8, f/4, f/11, or f/16).
-
Large Apertures (Small f-numbers like f/1.8 or f/2.8): The lens opens wide, letting in a massive amount of light. This creates a shallow depth of field, which means your subject stays razor-sharp while the background melts into a beautiful, soft blur (often called bokeh). This is the secret behind professional-looking portraits.
-
Small Apertures (Large f-numbers like f/11 or f/16): The opening becomes tiny, restricting the light. This creates a deep depth of field, ensuring that everything from the foreground to the distant horizon remains crisp and sharp. This is essential for landscape photography.
Shutter Speed: Freezing or Flowing Time
Shutter speed is the length of time the camera’s shutter remains open to expose the sensor to light. It is measured in fractions of a second (e.g., 1/500, 1/250) or whole seconds (e.g., 2″, 5″).
-
Fast Shutter Speeds (1/500s or faster): These speeds open and close in the blink of an eye, effectively freezing rapid motion. Use this when photographing energetic pets, sports, or flying birds.
-
Slow Shutter Speeds (1/30s or slower): These keep the shutter open longer, allowing moving elements to blur. This technique is used to capture the milky effect of waterfalls or the light trails of cars at night. Keep in mind that slow shutter speeds require a steady tripod to prevent your hands from shaking and ruining the entire shot.
ISO: The Sensor’s Light Sensitivity
ISO measures how sensitive your camera’s sensor is to the available light.
-
Low ISO (100 to 400): This is ideal for bright, outdoor environments. It produces the cleanest, highest-quality images with vibrant colors.
-
High ISO (3200 to 6400+): This artificially boosts the sensor’s sensitivity, allowing you to take photos in dim indoor settings or at night without a flash. The trade-off is that high ISO levels introduce digital “noise” or grain, which can make your photos look pixelated and less sharp.
3. Mastering Camera Modes: Moving Away from Auto
You do not have to jump straight into the intimidating fully Manual ($M$) mode on day one. Instead, utilize the semi-automatic modes built into your camera to transition away from Auto mode at your own pace.
| Camera Mode | What You Control | What the Camera Controls | Best Used For |
| Aperture Priority ($A$ or $Av$) | Aperture and ISO | Shutter Speed | Portraits, macro, and everyday creative shooting. |
| Shutter Priority ($S$ or $Tv$) | Shutter Speed and ISO | Aperture | Fast-moving sports, wildlife, or creative motion blur. |
| Manual Mode ($M$) | Aperture, Shutter Speed, and ISO | Nothing | Controlled environments like studios or night astrophotography. |
For most beginners, Aperture Priority is the ultimate learning sweet spot. It grants you control over the artistic depth of field while the camera ensures your image remains properly exposed.
4. The Rules of Composition: How to Build an Image
Having a perfectly exposed photo does not mean much if the image itself is boring to look at. Composition is the art of arranging visual elements within your frame to guide the viewer’s eye and tell a compelling story.
The Rule of Thirds
Imagine your frame is divided by two horizontal and two vertical lines, creating a grid of nine equal rectangles. Instead of placing your subject dead-center, try placing your primary point of interest on one of the four intersecting points, or along the grid lines. Positioning a person’s eyes on a top intersection or placing a landscape’s horizon along the bottom third line instantly creates a more dynamic, balanced composition.
Leading Lines
Our eyes are naturally drawn to lines. Look for natural or man-made lines in your environment—such as a winding road, a train track, a wooden fence, or a row of trees. Position yourself so these lines originate from the edges of your frame and point directly toward your main subject. This pulls the viewer deep into the photo.
Framing and Depth
Look for elements in the environment that can act as a “frame within a frame.” Shooting through an open window, an archway, or through overhanging tree branches adds layers to your image, transforming a flat two-dimensional photograph into a scene with realistic depth.
5. Finding and Understanding the Best Light
Light is the literal lifeblood of photography. The direction, color, and quality of light can completely alter the emotional mood of a photograph.
-
The Golden Hour: This occurs during the first hour after sunrise and the last hour before sunset. The sun sits low on the horizon, casting a soft, warm, golden glow with long, gentle shadows. It is widely considered the most flattering time of day for portraits and landscapes.
-
Midday Harsh Light: When the sun is directly overhead at noon, it casts bright, uncompromising light and dark, stark shadows (often resulting in dark circles under a subject’s eyes). If you must shoot at midday, look for open shade under a tree or a building to soften the illumination.
-
Overcast Sky Soft Light: Do not let gloomy, cloudy days keep you indoors. A cloudy sky acts like a massive, natural softbox, diffusing the sunlight evenly. This eliminates harsh shadows, making it absolutely perfect for capturing rich colors in nature or taking soft portraits.
6. Crucial Beginner Mistakes to Avoid
As you embark on your photography journey, avoiding these common pitfalls will accelerate your growth:
-
Chasing Gear Instead of Skill: Buying a professional camera will not instantly make you a professional photographer. Invest your time into learning composition, lighting, and storytelling first.
-
Ignoring the Background: It is easy to get so hyper-focused on your subject that you fail to notice a distracting trash can or a tree branch that looks like it is growing out of your subject’s head. Always scan the entire frame before pressing the shutter button.
-
Burrowing into One Perspective: Most beginners stand straight up, hold the camera at eye level, and shoot. Break out of this habit. Crouch down low to the ground to make your subject look monumental, or find a high vantage point to shoot downward for a unique bird’s-eye view.
Conclusion
Photography is a deeply rewarding journey of creative self-expression. There is no single “right” way to capture the world around you. The technical rules and composition guidelines outlined in this guide are not rigid laws; they are tools designed to help you understand how visual storytelling works. Once you feel comfortable with them, feel free to break them creatively.
Grab whatever camera you have available, step outside, and start practicing. Pay attention to how the light changes throughout the day, experiment with different angles, and do not be afraid to make mistakes. Every blurry or poorly exposed photo you take is not a failure—it is a vital stepping stone toward finding your unique creative voice.
Frequently Asked Questions (FAQ)
What camera should a beginner buy?
If you are completely new, start with your smartphone or an entry-level mirrorless or DSLR camera like the Canon EOS Rebel series or a Sony Alpha starter kit. Look for a camera that offers manual controls so you can grow into it.
What is the most important setting in photography?
There is no single most important setting, as Aperture, Shutter Speed, and ISO must work together inside the Exposure Triangle. However, Aperture is often considered the most creatively impactful setting because it dictates your depth of field and background blur.
Why are my photos blurry, and how do I fix them?
Blurry photos are usually caused by camera shake or subject movement. If your shutter speed is too slow (lower than 1/125s for hand-held shooting), your natural hand movements will blur the shot. Increase your shutter speed, widen your aperture, or use a sturdy tripod to stabilize the camera.
What is RAW format and should I use it?
A RAW file is an uncompressed image format that saves all the light data captured by your camera’s sensor. While JPEG files are smaller and pre-processed by the camera, RAW files give you maximum flexibility when editing your photos later in software like Lightroom or Photoshop. As a beginner, starting with JPEG is fine, but switch to RAW once you want to learn photo editing.