
Macro Photography Explained: How to Capture Incredible Close-Up Images
Every single day, a breathtaking world unfolds right beneath our feet, completely unnoticed by the casual observer. The intricate compound eye of a dragonfly, the crystalline structure of a morning snowflake, or the glistening dew drops resting delicate on a blade of grass—these miniature wonders remain hidden until viewed through a macro lens. Macro photography opens a portal into this mesmerizing realm, transforming ordinary, everyday subjects into extraordinary visual experiences.
However, stepping into macro photography involves much more than simply walking closer to your subject. It requires a distinct set of skills, an understanding of optical magnification, precise control over a razor-thin depth of field, and customized lighting solutions. Whether you are a beginner picking up a camera for the first time or an experienced photographer looking to expand your artistic toolkit, this comprehensive guide will explain everything you need to know about macro photography. You will learn about essential gear, critical camera settings, lighting techniques, and composition strategies to capture crisp, professional close-up images consistently.
What Is Macro Photography? Understanding Magnification Ratios
To truly master macro photography, you must first understand what differentiates a genuine macro photograph from a standard close-up image. In technical terms, true macro photography occurs when the image of the subject projected onto your camera’s digital sensor is equal to or larger than the actual physical size of the subject in real life. This concept is measured using a metric known as the magnification ratio.
A 1:1 magnification ratio (often referred to as “life-size” magnification) represents the industry standard for true macro photography. For example, if you photograph a small beetle that measures 10 millimeters in length, a true macro lens will project an exact 10-millimeter image of that beetle onto your camera sensor. If the magnification ratio reaches 2:1 or higher, the subject appears twice its physical size on the sensor, moving into the realm of ultra-macro photography.
Conversely, many consumer zoom lenses feature a marketing label called “macro mode.” In reality, most of these lenses only achieve a 1:2 or 1:4 magnification ratio. While these zoom optics allow you to focus closer than standard lenses, they produce close-up photography rather than true macro images. Recognizing this distinction is essential when investing in gear and setting realistic expectations for image detail.
Essential Macro Photography Gear: From Lenses to Budget Tools
While high-end camera equipment makes macro shooting more convenient, you do not need to spend thousands of dollars to capture stunning close-ups. Understanding your equipment options helps you make informed choices based on your current budget and creative goals.
True Macro Lenses vs. Alternative Attachments
Dedicated macro prime lenses represent the single best investment for close-up imaging. Available in focal lengths typically ranging from 60mm to 180mm, these lenses feature specialized optical designs engineered for edge-to-edge sharpness at extremely close focusing distances. A focal length between 90mm and 105mm is widely considered the ultimate sweet spot. It provides a comfortable “working distance”—the space between the front element of your lens and your subject—preventing you from casting shadows or scaring away timid insects.
If you are not ready to purchase a dedicated macro lens, several budget-friendly alternatives can deliver surprisingly sharp results:
-
Extension Tubes: These are hollow, light-tight cylinders placed between your camera body and an existing lens. By moving the rear glass element farther from the sensor, extension tubes dramatically reduce your lens’s minimum focus distance without adding extra glass optical elements that could degrade image clarity.
-
Reverse Rings: Inexpensive metal adapters that allow you to mount a standard prime lens (such as a 50mm f/1.8) backward onto your camera body. Mounting a lens in reverse converts it into a powerful magnifying glass at a fraction of the cost.
-
Close-Up Filters (Diopters): High-quality glass elements that screw directly onto the front filter threads of your existing lens, acting essentially like reading glasses for your camera.
-
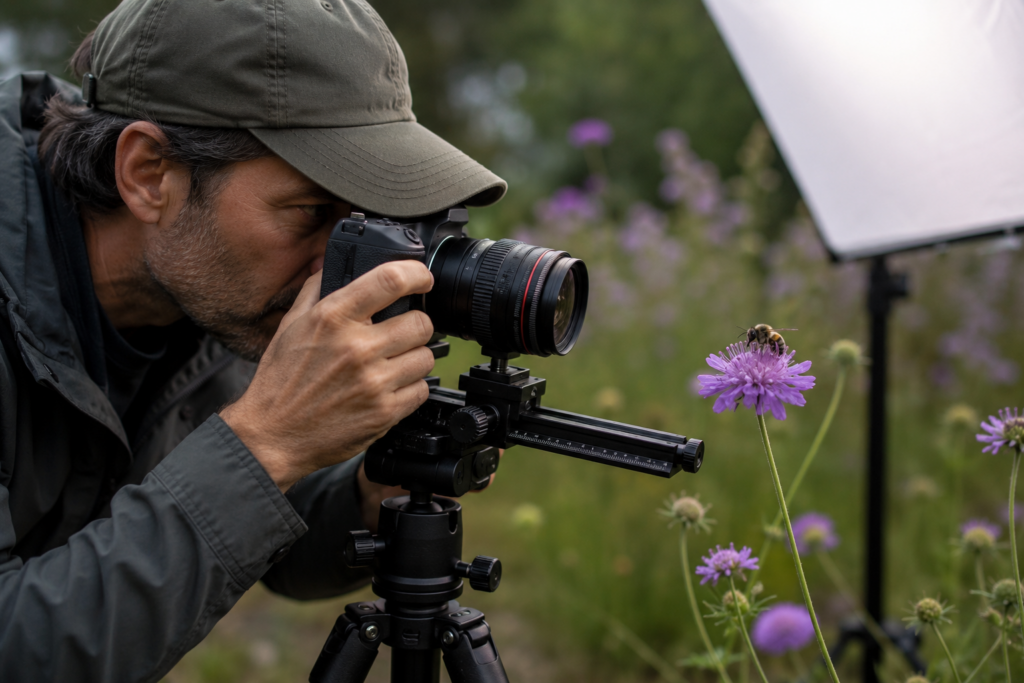
Tripods and Focusing Rails: Because high magnification amplifies even micro-vibrations, a sturdy tripod paired with a precision macro focusing rail allows you to adjust your focal point smoothly without moving the entire setup manually.
Camera Settings for Razor-Sharp Close-Up Images
Photographing subjects at life-size magnification amplifies every camera movement and focusing error. Dialing in your camera settings with precision is vital to achieving crisp, highly detailed shots.
First, switch your camera lens to Manual Focus (MF). At 1:1 magnification, autofocus systems frequently struggle and “hunt” back and forth because the zone of sharp focus is extraordinarily narrow. By relying on manual focus alongside your camera’s Focus Peaking or Live View zoom feature, you gain full control over pinpointing critical details, such as the facet of an insect’s eye or the delicate stamen of a flower blossom.
Second, pay close attention to your Shutter Speed. When shooting handheld, natural body tremors will introduce motion blur into your photos. Aim for a shutter speed of 1/250s or faster when working handheld. If you are using a tripod, you can afford slower shutter speeds, provided your subject remains perfectly still and there is no wind disturbance.
Third, maintain tight control over your ISO setting. Keep your ISO as low as possible—ideally between ISO 100 and ISO 400—to minimize digital noise. High ISO noise can easily obliterate the ultra-fine textures and micro-details that make macro photographs compelling.
Tackling the Depth of Field Dilemma and Focus Stacking
The single greatest physical challenge in macro photography is managing Depth of Field (DoF). As you move closer to your subject and magnification increases, your optical depth of field shrinks exponentially. At 1:1 magnification, even when shooting at an aperture like f/8, your in-focus zone might only be a fraction of a millimeter thick.
To compensate for this ultra-thin focus plane, macro photographers narrow their lens aperture to values between f/8 and f/16. However, be cautious about stopping down to smaller apertures like f/22 or f/32. Extremely small apertures trigger an optical phenomenon known as diffraction, which bends light waves as they pass through the aperture blades, rendering the entire image soft.
When a narrow aperture still fails to bring your entire subject into focus, the ultimate solution is Focus Stacking. This advanced technique involves taking a series of consecutive photos of the exact same subject, slightly shifting the focal plane forward with each shot. Using editing software such as Adobe Photoshop or Helicon Focus, you combine the sharpest portions of every frame into a single final image featuring unbelievable depth of field and edge-to-edge clarity.
Lighting the Tiny World: Flash, Diffusers, and Natural Light
Because small apertures like f/11 significantly restrict the amount of light reaching your camera sensor, macro photography demands an ample light source. Relying exclusively on ambient daylight often forces you to slow down shutter speeds or raise ISO levels, which introduces motion blur or image noise.
Using an external flash or speedlight solves this light deficit, allowing you to shoot at low ISO settings and fast shutter speeds. However, raw, direct flash creates harsh shadows, unpleasant specular highlights, and unnatural reflections. To achieve professional, natural-looking illumination, attach a custom macro flash diffuser to soften the light output. Diffusers spread the light beam evenly across your subject, wrapping details in a soft glow that brings out vibrant colors and subtle surface textures.
Alternatively, specialized ring lights or twin-flash systems mount directly to the front of your lens, delivering balanced, shadowless light that is ideal for clinical, scientific, or detailed botanical photography. For photographers who prefer natural light, shooting on overcast days or using a small collapsible diffuser panel shields your subject from harsh mid-day sunlight.
Compositional Tips for Captivating Macro Shots
Creating a memorable macro photograph requires more than technical precision; thoughtful composition elevates a simple close-up into an artistic masterpiece.
-
Focus on the Eyes: When photographing insects, spiders, or small reptiles, always ensure the eyes are razor-sharp. The eyes serve as the primary emotional anchor for the viewer.
-
Isolate Your Background: Pay attention to what lies behind your subject. Position your camera so that the background is as far away as possible, creating a smooth, cream-like background blur (bokeh) that isolates your main subject cleanly.
-
Search for Patterns and Textures: Macro photography thrives on structural detail. Look for repeating geometric patterns in leaf veins, feather barbs, or butterfly wings to construct striking abstract compositions.
-
Change Your Shooting Angle: Avoid taking every photo looking down from above. Lower your camera position to eye level with your subject to create an engaging, intimate perspective that draws viewers directly into their miniature world.
Conclusion
Macro photography unlocks a hidden universe existing right beside us, inviting photographers to slow down, observe carefully, and appreciate the incredible complexity of nature and everyday objects. While mastering close-up imaging requires patience, technical discipline, and precise gear handling, the visual rewards are unmatched.
By understanding magnification ratios, choosing the right tools for your budget, controlling depth of field, and mastering diffused lighting, you can consistently capture sharp, awe-inspiring macro images. Grab your camera, step into your garden or local park, and begin revealing the extraordinary micro-world waiting to be discovered.
Frequently Asked Questions (FAQ)
Can I take macro photos using a smartphone?
Yes, many modern smartphones feature dedicated macro modes or multi-lens systems capable of focusing close to subjects. While smartphones rely on smaller sensors and digital processing, pairing your phone with a quality clip-on macro lens attachment can produce surprisingly sharp results for casual shooting.
What is the best focal length for a dedicated macro lens?
A focal length between 90mm and 105mm is widely considered ideal for general macro photography. Lenses in this range offer a comfortable working distance, allowing you to illuminate your subject easily without casting camera shadows or startling live insects.
Why are my macro photographs coming out blurry?
Blurry macro photos are typically caused by three factors: camera shake, subject movement, or an extremely shallow depth of field. To fix this, use a fast shutter speed (1/250s or faster), mount your camera on a sturdy tripod, and switch to manual focus for precise control over your focus point.
Is focus stacking necessary for every macro shot?
No, focus stacking is optional and primarily used when you need an entire subject completely in focus from front to back. For single-frame photography, using apertures between f/8 and f/11 often provides sufficient depth of field while preserving optimal lens sharpness.