
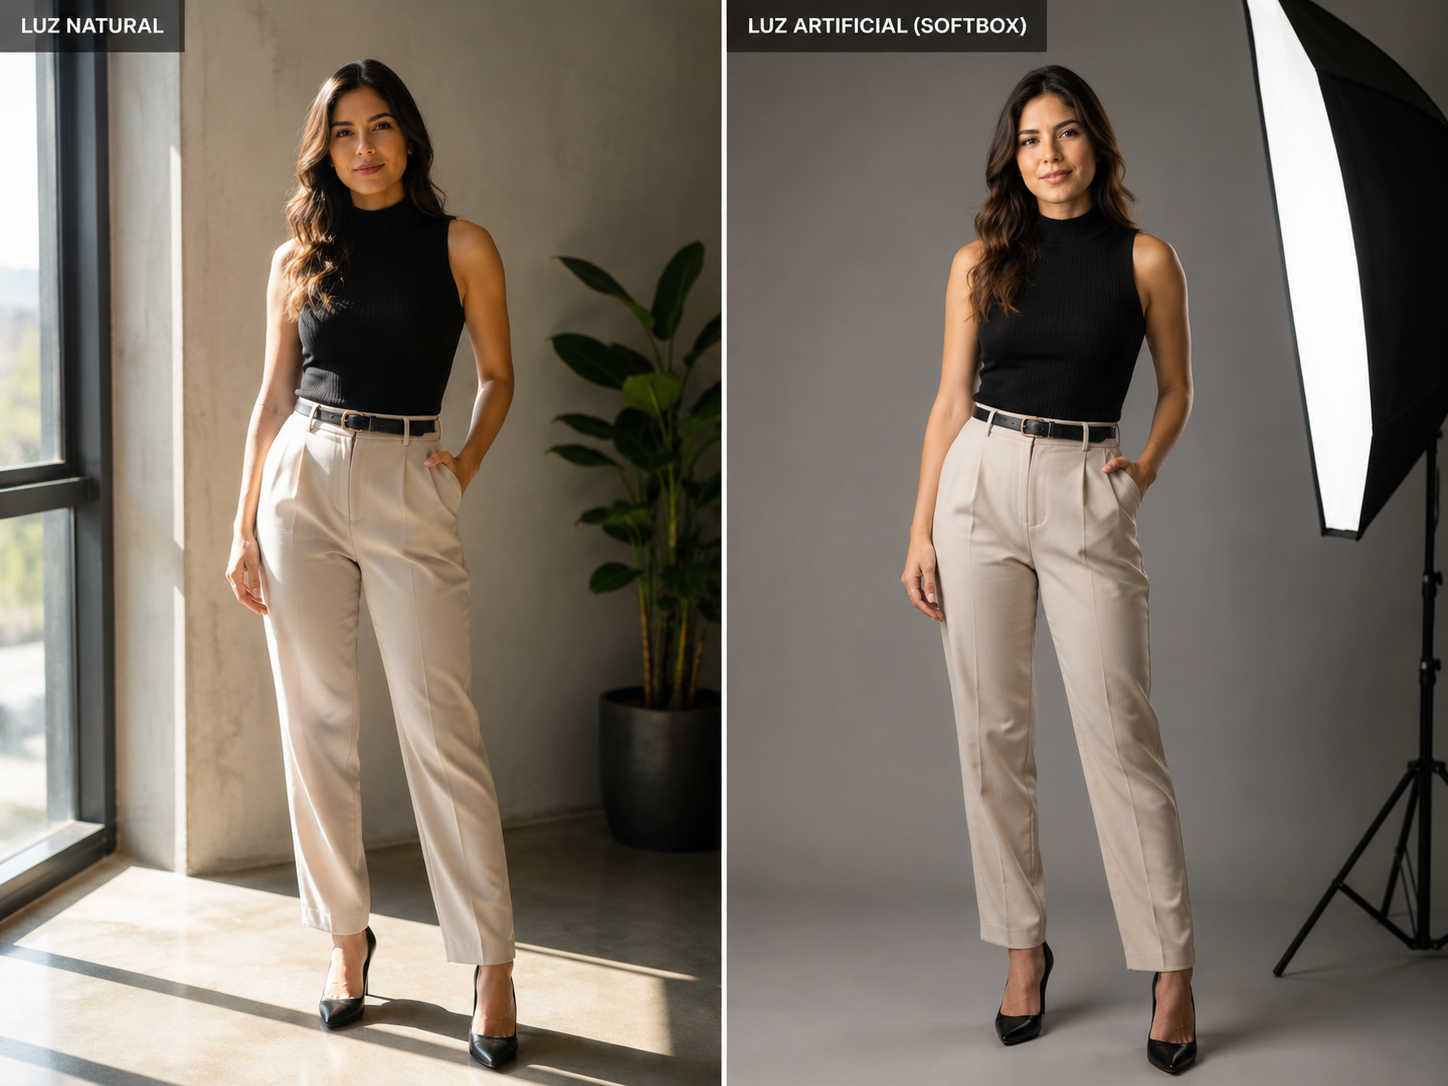
Photography Lighting Basics for Beginners: A Complete Guide to Natural vs. Artificial Light
Photography Lighting Basics: Natural vs. Artificial Light
The word “photography” originates from ancient Greek, literally meaning “drawing with light.” If the camera is the artist’s brush and the digital sensor is the canvas, lighting is the paint that imparts life, dimension, and emotion to every single image. When stepping into the world of photography, beginners often dedicate their initial energy to acquiring expensive camera bodies, fast lenses, and mastering exposure settings like ISO, aperture, and shutter speed. However, even the most sophisticated camera system cannot compensate for a poorly lit scene.
The fundamental crossroads every photographer eventually reaches is deciding whether to rely on ambient natural light or invest in artificial lighting gear. Both sources possess distinct characteristics, strategic advantages, and inherent limitations. There is no single “best” light source in absolute terms; rather, there is an ideal lighting setup for the specific creative vision and environmental conditions of your shoot.
In this comprehensive guide, you will learn the core principles of photography lighting, analyze the critical differences between natural and artificial light, and discover exactly when to use each to dramatically improve your visual work.
1. Why Lighting Is the Core Foundation of Photography
To effectively manipulate different light sources, one must first understand what light actually does within a photographic frame. Lighting goes far beyond simply making a subject visible to the camera sensor. It is the primary tool used to set the mood, reveal intricate textures, carve out three-dimensional volume, and guide the viewer’s eye toward the focal point of the image.
To take full creative control, every photographer should analyze four fundamental properties of light:
-
Quality: Refers to how light transitions from highlights into shadows. Hard light creates crisp, distinct shadows and high contrast (such as direct overhead sunlight), while soft light produces gentle, gradual transitions and low-contrast shadows (such as light filtered through an overcast sky).
-
Direction: The angle from which light strikes the subject drastically alters the perception of depth. Front lighting tends to flatten features, side lighting highlights texture and dimension, and backlighting creates striking rim light or silhouettes.
-
Intensity: The overall brightness or quantity of light illuminating the scene, which directly impacts your camera’s exposure settings.
-
Color Temperature: Measured on the Kelvin scale (K), color temperature dictates the color cast of the light. Lower numbers represent warm, amber tones (such as a sunset around 3,000 K), whereas higher numbers indicate cool, bluish tones (such as open shade around 6,500 K).
Understanding how to read and adapt to these four properties is the foundation of artistic growth in photography.
2. Mastering Natural Light: The Beauty of Spontaneity
Natural light encompasses any light originating from the sun or moon, including ambient light reflected off surrounding surfaces like walls, sand, or water. It remains the most popular choice for outdoor portraiture, street photography, travel, landscapes, and lifestyle shoots.
Advantages of Natural Light
-
Cost-Effective and Accessible: It requires zero financial investment. Sunlight is available to everyone, everywhere, whether shooting with a flagship camera or a smartphone.
-
Organic and Authentic Aesthetic: Delivers realistic skin tones and an authentic atmosphere that resonates emotionally with viewers.
-
Intuitive Learning Curve: Working with ambient light trains your eyes to observe environmental reflections, shadows, and subtle highlights in real-world scenarios.
Challenges of Natural Light
-
Unpredictable Weather: Passing clouds, sudden rain, or shifting haze can instantly change the intensity and color temperature of your scene.
-
Limited Time Windows: High-quality natural light changes rapidly as the sun moves across the sky, often leaving only short windows for optimal shooting.
-
Lack of Direct Control: You cannot adjust the brightness or change the position of the sun. You must either move your subject or use portable modifiers like reflectors and diffusers.
Strategic Times to Shoot with Natural Light
-
Golden Hour: Occurs during the first hour after sunrise and the last hour before sunset. It produces warm, soft, low-angle light with long, gentle shadows.
-
Blue Hour: The brief period just before sunrise or right after sunset when the sky turns a deep blue. Ideal for cityscapes and evocative, moody images.
-
Open Shade: Areas shielded from direct sunlight on bright days (such as under a building awning or large tree canopy). Open shade provides soft, even, and flattering illumination for portraits.
3. Demystifying Artificial Light: Total Control Over Your Scene
Artificial light refers to light sources created by human technology. This includes dedicated photography gear like studio strobes, shoe-mounted speedlights, and continuous LED panels, as well as ambient sources like household lamps and streetlights.
Advantages of Artificial Light
-
Complete Creative Control: Gives you total authority over the direction, power, spread, quality, and color temperature of your light source.
-
Consistency and Repeatability: The lighting remains 100% stable over long periods, ensuring that the first image of a commercial product catalog looks identical to the last.
-
Time and Weather Independence: Allows you to recreate the look of a bright, sunny afternoon inside a windowless room at midnight.
Challenges of Artificial Light
-
Equipment Costs: Requires an initial financial investment in light heads, stands, triggers, and modifiers (such as softboxes, umbrellas, and grids).
-
Technical Learning Curve: Demands a clear understanding of flash sync speeds, light falloff principles (like the Inverse-Square Law), and modifier selection.
-
Logistics and Weight: Carrying lights, batteries, stands, and heavy modifiers on location requires extra setup time and transport considerations.
Primary Types of Artificial Light
-
Continuous Lighting (LEDs): The light source remains on constantly. This allows you to preview shadows, highlights, and exposure in real time before pressing the shutter button, making it excellent for both video and photography.
-
Flash / Speedlights / Strobes: Emits a powerful burst of light lasting only a fraction of a second. Flashes provide immense power, allowing you to overpower the sun or freeze high-speed motion with absolute clarity.
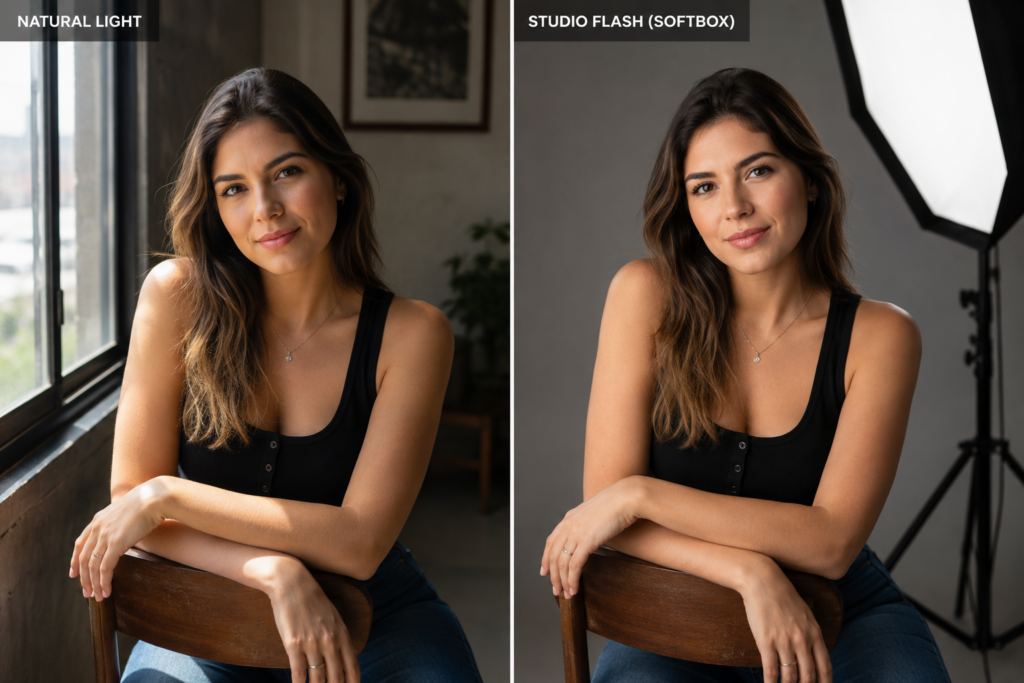
4. Natural vs. Artificial Light: A Practical Comparison
To help you determine which lighting approach best fits your current project, consider the following operational overview:
| Evaluation Factor | Natural Light | Artificial Light |
| Financial Cost | Free | Requires equipment investment |
| Ease of Learning | High (intuitive observation) | Moderate to Advanced (requires technical study) |
| Control Level | Low (dependent on nature) | Total (fully customizable) |
| Consistency | Dynamic (changes throughout the day) | 100% consistent and repeatable |
| Portability | Maximum (no extra gear needed) | Requires carrying stands, power, and modifiers |
| Best Applications | Landscapes, street, travel, lifestyle | Studio, product, e-commerce, high fashion |
Best Choice by Photography Genre
-
Product and E-commerce Photography: Artificial light is the industry standard because catalog shoots demand absolute color accuracy and uniform lighting across hundreds of items.
-
Travel and Documentary Photography: Natural light is ideal due to the need for speed, mobility, and capturing genuine moments without setting up gear.
-
Portrait Photography: Both sources work brilliantly. Natural window light creates soft, intimate, and painterly portraits, while studio lighting delivers polished, high-contrast, commercial results.
5. How to Combine Natural and Artificial Light for Stunning Results
Choosing between natural and artificial light does not have to be an all-or-nothing decision. In fact, combining both sources is a hallmark technique used by advanced photographers to craft dynamic, high-end imagery.
A classic example of this hybrid approach is the fill flash technique:
When photographing a subject outdoors with a vibrant sunset behind them, setting your camera exposure for the bright sky will leave the person in deep shadow (a silhouette). By placing a portable flash with a softbox in front of your subject, you can illuminate their face clearly while keeping the sunset rich and colorful in the background.
Indoors, you can use diffuse sunlight coming through a large window as your primary light source (key light), while placing a low-power LED panel on the opposite side to gently lift dark shadows (fill light), achieving a balanced and three-dimensional portrait.
6. Frequently Asked Questions (FAQ)
Which light source is best for absolute beginners?
Natural light is highly recommended for beginners. It allows you to focus on mastering camera mechanics, composition, and framing without the added complexity or expense of managing off-camera flashes and triggers.
Can you achieve professional-quality photos using only natural light?
Yes, absolutely. Many award-winning portrait, editorial, and fine art photographers rely exclusively on natural light. Professional results depend on your ability to recognize light quality, direction, and how to position your subject relative to the light source.
What is the main difference between continuous LED panels and flash strobes?
Continuous LEDs stay on constantly, making it easy to preview lighting patterns in real time, which is especially useful for video. Flashes emit a far more powerful burst of light in a fraction of a second, enabling you to overpower ambient sunlight and freeze fast action easily.
How do I soften harsh sunlight when shooting outdoors at noon?
You can move your subject into open shade (such as under a building or tree), or position a collapsible diffuser screen between the sun and your subject to transform harsh direct light into a smooth, flattering illumination.
7. Conclusion: Finding Your Visual Language
Lighting is the ultimate tool for visual storytelling. Natural light offers organic beauty, unexpected moments, and a seamless connection to the ambient world. Meanwhile, artificial light provides precision, absolute control, and the freedom to create consistent, studio-quality visuals regardless of time or weather.
Rather than favoring one exclusively, versatile photographers learn to appreciate and utilize both. Start by analyzing the natural light available in your daily environment, experiment with shadows and angles, and introduce artificial sources when your creative vision requires greater control. Master the behavior of light, and you will transform your photography from simple snapshots into captivating artwork.